These are the awesome cards that were submitted for the 2020 New Catalog Swap. You should join us for the Holiday Mini Swap and get some fun mail.


These are the awesome cards that were submitted for the 2020 New Catalog Swap. You should join us for the Holiday Mini Swap and get some fun mail.
I am such a nut for Halloween and always enjoy creating a fun Halloween card. Hope you enjoy this one!


SUPPLIES
STAMP SETS:
Wonderfully Wicked (#150547)

CARDSTOCK:
Basic Black (#121045)
   8-1/2" x 5-1/2"  scored at 2", 3-1/8", 5-3/8", 6-1/2"

Black Foil (#147898)
   1" square for the spider

Highland Heather (#146986)
   1-3/4" x 5-1/4" - cut two
   1" x 5-1/4" - cut two
   2" x 5-1/4" - cut two

Gorgeous Grape (#146987)
   4-3/4" x 2"  (for the Wicked framelit)

INK:
Gorgeous Grape (#147099)
Memento Black (#132708)

OTHER:
Brick & Mortar 3D Embossing Folder (#149643)
Wicked Dies (#150725)
Champagne Shimmer Paint (#147044)
Dimensionals (#104430)
NOTE:  I wish I had remembered to use the new black ones that are in the Holiday Mini (#150893) that I have!!
If you’d like to make this card, shop for the supplies – HERE!
Extra information for reserving your Stamparatus (Love the name – as I’ve said before – but more importantly, I love what it will do for you!)
If you are interested in reserving your Stamparatus – please read through the following – to the end!
Either TODAY or any day between December 5 and December 30 you need to know the following. Reservations open today (Dec 5) at 4:00 pm ET!

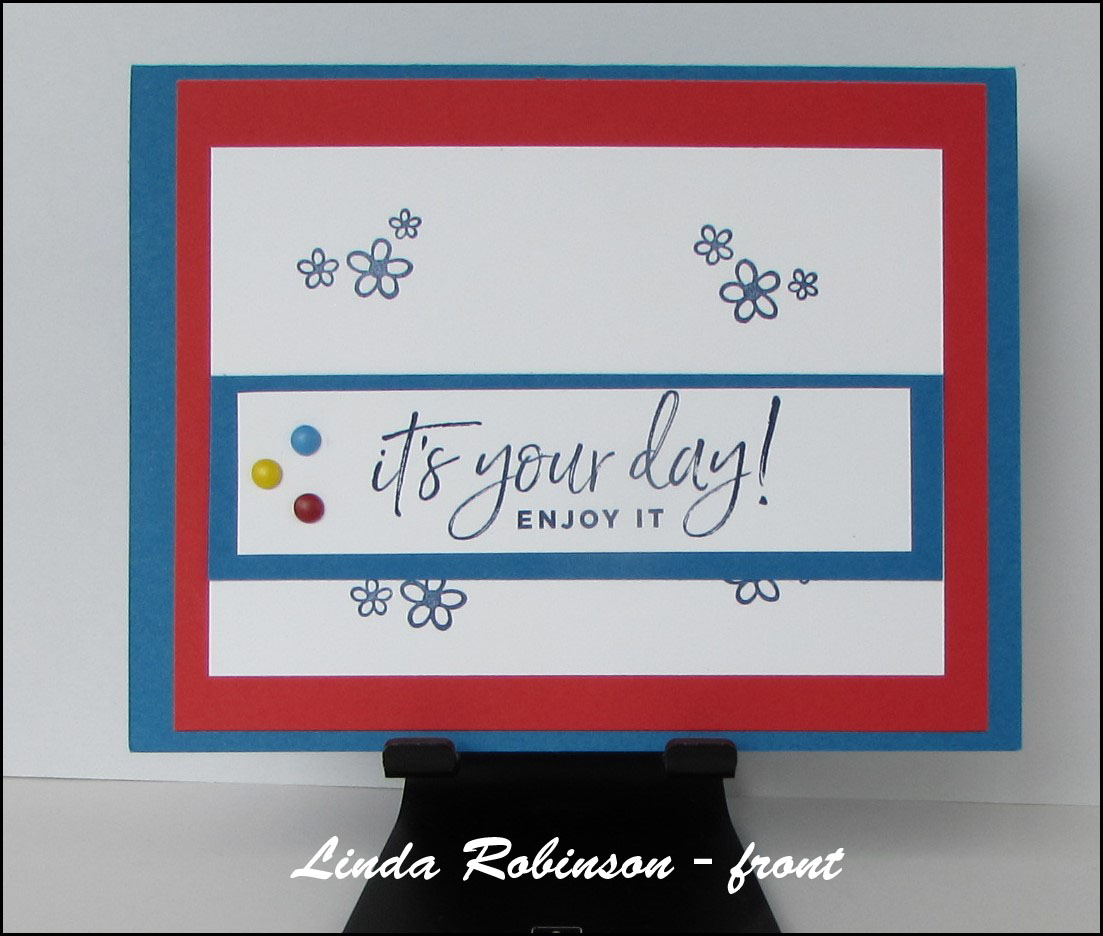
I love the Dragonfly Dreams stamp set and Detailed Dragonfly thinlits – one of the products in the new 2017 Occasions Catalog! I plan on doing more cards with this set.

You can use your bone folder to gently roll the dragonfly wings before you glue it in place.
Instructions:
1. Fold the Mint Macaron card base.
Tape/glue the Whisper White layer to the card base.
2. Randomly stamp the dots across the top and across the
bottom of the Dapper Denim layer.
3. Using the smaller dragonfly thinlit, cut one from the
Dapper Denim layer – a little above center. You can keep or
discard the dragonfly that is cut out.
4. Use the dragonfly thinlit with the detailed wings, cut one from
Vellum Cardstock. Lightly brush this dragonfly with a sponge
and Dapper Denim ink.
5. Glue the square of Dazzling Diamond Glimmer paper to the
back of the Dapper Denim layer behind the cut out of the
dragonfly. Tape/glue this layer to the White layer.
6. Put a line of Tombow down the center of the Vellum
dragonfly and insert it into the cut out in the Dapper Denim
layer. You will have to hold it a few seconds to get the glue
to stick to the Dazzling Diamond layer.
7. Using a strip of Mint Macaron, create your greeting piece and
use dimensionals to attach to the card front.
Stamps: Dragonfly Dreams
Cardstock: Mint Macaron, Whisper White, Dapper Denim, Vellum Cardstock, Dazzling Diamond Glimmer paper
Ink: Dapper Denim
Other: Detailed Dragonfly Thinlits, Project Life Cards & Labels Thinlits
Cuts:
Mint Macaron card base – 5-1/2″ x 8-1/2″ scored at 4-1/4″
Whisper White – 5-1/8″ x 3-7/8″
Dapper Denim – 5″ x 3-3/4″
Vellum Cardstock – 3″ x 4″
Mint Macaron – 4-1/4″ x 1-1/4″ (for greeting)
Diamond Glimmer – 3-1/2″ square
If you would like to order the supplies for this card, please shop in my online store.
The Hostess Code thru the end of February 2017 is TWQSZNKX.
Have you tried to get your new Stampin’ Up! framelits or thinlits off that very sticky paper without bending them? My friend Susie Guenther gave me the following tip and it works slicker than you know what!
Lay the white card with the framelits attached face down on your work surface. Lift up the corner of the white card back to the first framelit. Place your bonefolder on the framelit and hold the framelit tightly against the work surface while you pull the white sticky card away from the framelit.

Step 1
As you pull the white card away from the framelit, keep moving your bonefolder on the framelit. Once a framelit is released, move on to the next framelit until they are all set free.

Step 2
Once they are all set free, I throw that card with the sticky tape on it in the trash. I found that if I stuck the framelits back on the card, you run into the same problem trying to get them free again.
I purchased magnetic sheets (25 sheets 5″ x 7″ Magnetic (20 mil) Adhesive Magnet) from Amazon and that’s what I transfer my framelits to after they have been set free.
Side Note: If you have a scanner, scan the sheet of framelits before you release them. Then, whether you just simply place them back in the envelope they came in or transfer them to a magnetic sheet, you have an image of the shapes that came with the set – always a great idea in case you lose one – then you know what is missing.

Scanned copy of the framelits
I hope you find this helpful!
Tammy and Tess sent their cards on time – I’m the one that is running late – with apologies!! These are the last two cards from the InkUp Holiday Mini Card Swap. Check the previous posts for the earlier cards that were posted for this swap. The girls did a marvelous job!
There will be a new card swap from the new Occasions Mini Catalog! Watch for details – coming soon! I hope you will considering joining the next swap.

Tammy Johnson

Tess Bone
Two more wonderful swap cards. Still more to come!

Rhonda Wells

Sharon Cline
Following are the first of the InkUp Holiday Mini Card swaps. These are the ones I have received so far. As I receive the remainder, I will get them posted. Enjoy browsing and don’t forget to pin them to Pinterest.

Beverley Heclo

Denise Weidele

Ellie Cammer
More to come!
I had lots of fun making this “Tunnel Card”. It’s a technique that I saw on several blogs and decided to try it myself. I did it in a beach theme – go figure! I love this card format because it looks like a regular card from the front until you open it up and get a little surprise.

 Instructions:

Earlier this month, several of the InkUp stampers participated in a swap. The cards were awesome!
We are going to do a Halloween/Thanksgiving/Fall/Winter/Holiday swap. I will be sending all the details out in an email shortly! In the meantime, enjoy the wonderful talent of your fellow InkUp stampers! Great job gals!


